> ## Documentation Index
> Fetch the complete documentation index at: https://docs.poixe.com/llms.txt
> Use this file to discover all available pages before exploring further.
# Gemini CLI
> Google's open-source terminal coding agent
## Introduction
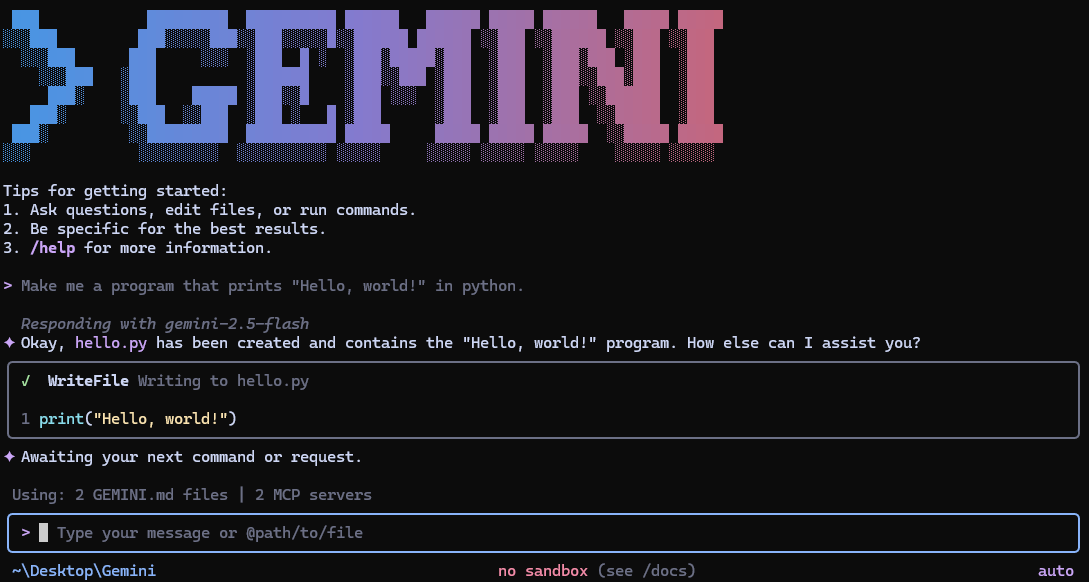
Gemini CLI is a local coding agent that runs in your terminal. It understands, modifies, and executes against your codebase, and offers both an interactive TUI and scripted (headless) usage.
This section explains **how to connect the AI models provided by Poixe to Gemini CLI** (without changing any of your usage habits; only the authentication and request target address are replaced).
 Reference for installation, commands, configuration, and usage
Source code, releases, and contribution guide
## Prerequisites
Make sure you have:
* An open terminal or command prompt
* A code project to work on (a Git repository is recommended)
* An API token that supports the [Google Gemini Content protocol](/en/api-reference/text-api/google-gemini-content/overview) ([how to create a token](/en/docs/dashboard/create-tokens))
Also confirm that your machine meets the Gemini CLI runtime requirements (refer to the official documentation for the Node.js version).
## Install Gemini CLI
Install globally with NPM (provided by both the official repository and documentation):
```bash theme={"theme":{"light":"min-light","dark":"min-dark"}}
npm install -g @google/gemini-cli
```
Verify the installation:
```bash theme={"theme":{"light":"min-light","dark":"min-dark"}}
gemini -v
gemini --help
```
## Configure environment variables
```bash theme={"theme":{"light":"min-light","dark":"min-dark"}}
# Route Gemini CLI through the Poixe gateway
export GOOGLE_GEMINI_BASE_URL="https://api.poixe.com"
# Use your Poixe API Key (manage it with your own environment variable approach)
export GEMINI_API_KEY="$POIXE_API_KEY"
# Optional: write to your shell profile to persist (zsh example)
echo 'export GOOGLE_GEMINI_BASE_URL="https://api.poixe.com"' >> ~/.zshrc
echo 'export GEMINI_API_KEY="$POIXE_API_KEY"' >> ~/.zshrc
# Reload the configuration after saving
source ~/.zshrc
```
```bash theme={"theme":{"light":"min-light","dark":"min-dark"}}
setx GOOGLE_GEMINI_BASE_URL "https://api.poixe.com"
setx GEMINI_API_KEY "$env:POIXE_API_KEY"
```
## Initial setup
```bash theme={"theme":{"light":"min-light","dark":"min-dark"}}
gemini
```
In the interactive interface, enter:
```bash theme={"theme":{"light":"min-light","dark":"min-dark"}}
/auth
```
Prompt: `How would you like to authenticate for this project?`
Select: `Use Gemini API Key`
```bash theme={"theme":{"light":"min-light","dark":"min-dark"}}
# Type directly in interactive mode
"hi"
# Or run directly in the terminal
gemini "hi"
```
## Get started
Go to your project directory and start it:
```bash theme={"theme":{"light":"min-light","dark":"min-dark"}}
cd /path/to/your/project
gemini
```
You can give it a task directly (then continue with follow-up questions or execution interactively):
```bash theme={"theme":{"light":"min-light","dark":"min-dark"}}
gemini "scan this repo, explain what it does, then propose a minimal plan to add a health check endpoint"
```
## Notes
### 1. Permissions and execution risks
Gemini CLI can read, write, and execute. Use it only in repositories you trust, and approve operations involving deletion, bulk changes, or script execution with caution.
### 2. Behavior differences under the Poixe gateway
Poixe is a relay layer and makes certain engineering trade-offs in stability, risk control, billing, and tool capabilities. If some capability is unavailable or behaves differently, first consult the relevant sections of Poixe's [compatibility and differences](/en/api-reference/introduction/differences/overview) documentation.
## FAQ
We recommend using the API Key environment variable approach first:
* Confirm that `GEMINI_API_KEY="$POIXE_API_KEY"` is set
* Confirm that `GOOGLE_GEMINI_BASE_URL="https://api.poixe.com"` is set
* Restart your terminal so the environment variables take effect
Also, if you previously went through the official login flow, that login state may not match the current gateway target. We recommend switching to the API Key approach.
This is usually caused by permission/execution policies:
* First confirm that the current working directory is writable
* For dangerous commands (delete/install/run scripts), review them manually and approve step by step
* If necessary, break the task into smaller pieces: have it output a plan and diff first, then decide whether to execute
(Refer to the official documentation for details on permissions and modes.)
* First check that the environment variables (Base URL / API Key) are correct
* When reproducing, provide the request time and key error messages whenever possible
* If you need help locating the problem, include the Poixe Request ID when contacting the team
This documentation is built and hosted on [Mintlify](https://mintlify.com), a developer documentation platform.
Reference for installation, commands, configuration, and usage
Source code, releases, and contribution guide
## Prerequisites
Make sure you have:
* An open terminal or command prompt
* A code project to work on (a Git repository is recommended)
* An API token that supports the [Google Gemini Content protocol](/en/api-reference/text-api/google-gemini-content/overview) ([how to create a token](/en/docs/dashboard/create-tokens))
Also confirm that your machine meets the Gemini CLI runtime requirements (refer to the official documentation for the Node.js version).
## Install Gemini CLI
Install globally with NPM (provided by both the official repository and documentation):
```bash theme={"theme":{"light":"min-light","dark":"min-dark"}}
npm install -g @google/gemini-cli
```
Verify the installation:
```bash theme={"theme":{"light":"min-light","dark":"min-dark"}}
gemini -v
gemini --help
```
## Configure environment variables
```bash theme={"theme":{"light":"min-light","dark":"min-dark"}}
# Route Gemini CLI through the Poixe gateway
export GOOGLE_GEMINI_BASE_URL="https://api.poixe.com"
# Use your Poixe API Key (manage it with your own environment variable approach)
export GEMINI_API_KEY="$POIXE_API_KEY"
# Optional: write to your shell profile to persist (zsh example)
echo 'export GOOGLE_GEMINI_BASE_URL="https://api.poixe.com"' >> ~/.zshrc
echo 'export GEMINI_API_KEY="$POIXE_API_KEY"' >> ~/.zshrc
# Reload the configuration after saving
source ~/.zshrc
```
```bash theme={"theme":{"light":"min-light","dark":"min-dark"}}
setx GOOGLE_GEMINI_BASE_URL "https://api.poixe.com"
setx GEMINI_API_KEY "$env:POIXE_API_KEY"
```
## Initial setup
```bash theme={"theme":{"light":"min-light","dark":"min-dark"}}
gemini
```
In the interactive interface, enter:
```bash theme={"theme":{"light":"min-light","dark":"min-dark"}}
/auth
```
Prompt: `How would you like to authenticate for this project?`
Select: `Use Gemini API Key`
```bash theme={"theme":{"light":"min-light","dark":"min-dark"}}
# Type directly in interactive mode
"hi"
# Or run directly in the terminal
gemini "hi"
```
## Get started
Go to your project directory and start it:
```bash theme={"theme":{"light":"min-light","dark":"min-dark"}}
cd /path/to/your/project
gemini
```
You can give it a task directly (then continue with follow-up questions or execution interactively):
```bash theme={"theme":{"light":"min-light","dark":"min-dark"}}
gemini "scan this repo, explain what it does, then propose a minimal plan to add a health check endpoint"
```
## Notes
### 1. Permissions and execution risks
Gemini CLI can read, write, and execute. Use it only in repositories you trust, and approve operations involving deletion, bulk changes, or script execution with caution.
### 2. Behavior differences under the Poixe gateway
Poixe is a relay layer and makes certain engineering trade-offs in stability, risk control, billing, and tool capabilities. If some capability is unavailable or behaves differently, first consult the relevant sections of Poixe's [compatibility and differences](/en/api-reference/introduction/differences/overview) documentation.
## FAQ
We recommend using the API Key environment variable approach first:
* Confirm that `GEMINI_API_KEY="$POIXE_API_KEY"` is set
* Confirm that `GOOGLE_GEMINI_BASE_URL="https://api.poixe.com"` is set
* Restart your terminal so the environment variables take effect
Also, if you previously went through the official login flow, that login state may not match the current gateway target. We recommend switching to the API Key approach.
This is usually caused by permission/execution policies:
* First confirm that the current working directory is writable
* For dangerous commands (delete/install/run scripts), review them manually and approve step by step
* If necessary, break the task into smaller pieces: have it output a plan and diff first, then decide whether to execute
(Refer to the official documentation for details on permissions and modes.)
* First check that the environment variables (Base URL / API Key) are correct
* When reproducing, provide the request time and key error messages whenever possible
* If you need help locating the problem, include the Poixe Request ID when contacting the team
This documentation is built and hosted on [Mintlify](https://mintlify.com), a developer documentation platform.