> ## Documentation Index
> Fetch the complete documentation index at: https://docs.poixe.com/llms.txt
> Use this file to discover all available pages before exploring further.
# Cherry Studio
> 一款集多模型对话、知识库管理、AI 绘画、翻译等功能于一体的全能 AI 助手平台。
## 前言
Cherry Studio 是一款桌面端 AI 客户端,主打**多模型对话 + 可自定义模型服务商 + 模型管理**,适合把你常用的各类模型统一放在一个聊天界面里用。
本节将介绍如何在 Cherry Studio 里配置 Poixe API,并进行对话。
下载客户端(Windows/macOS/Linux 等)。
查看更完整的功能与配置说明。
## 使用演示
这里我们演示如何使用 Poixe AI 提供的 AI 模型接口在 Cherry Studio 里进行对话,获取费马大定理的简要证明。
## 准备工作
* 鉴权密钥 API Key(在控制台创建) → 查看创建方式
* 接口地址 Base URL(在文档中复制)→ 查看接口信息
* 可用模型 Models(复制模型名称)→ 模型列表 / 模型命名
## 在 Cherry Studio 里配置 Poixe(核心步骤)
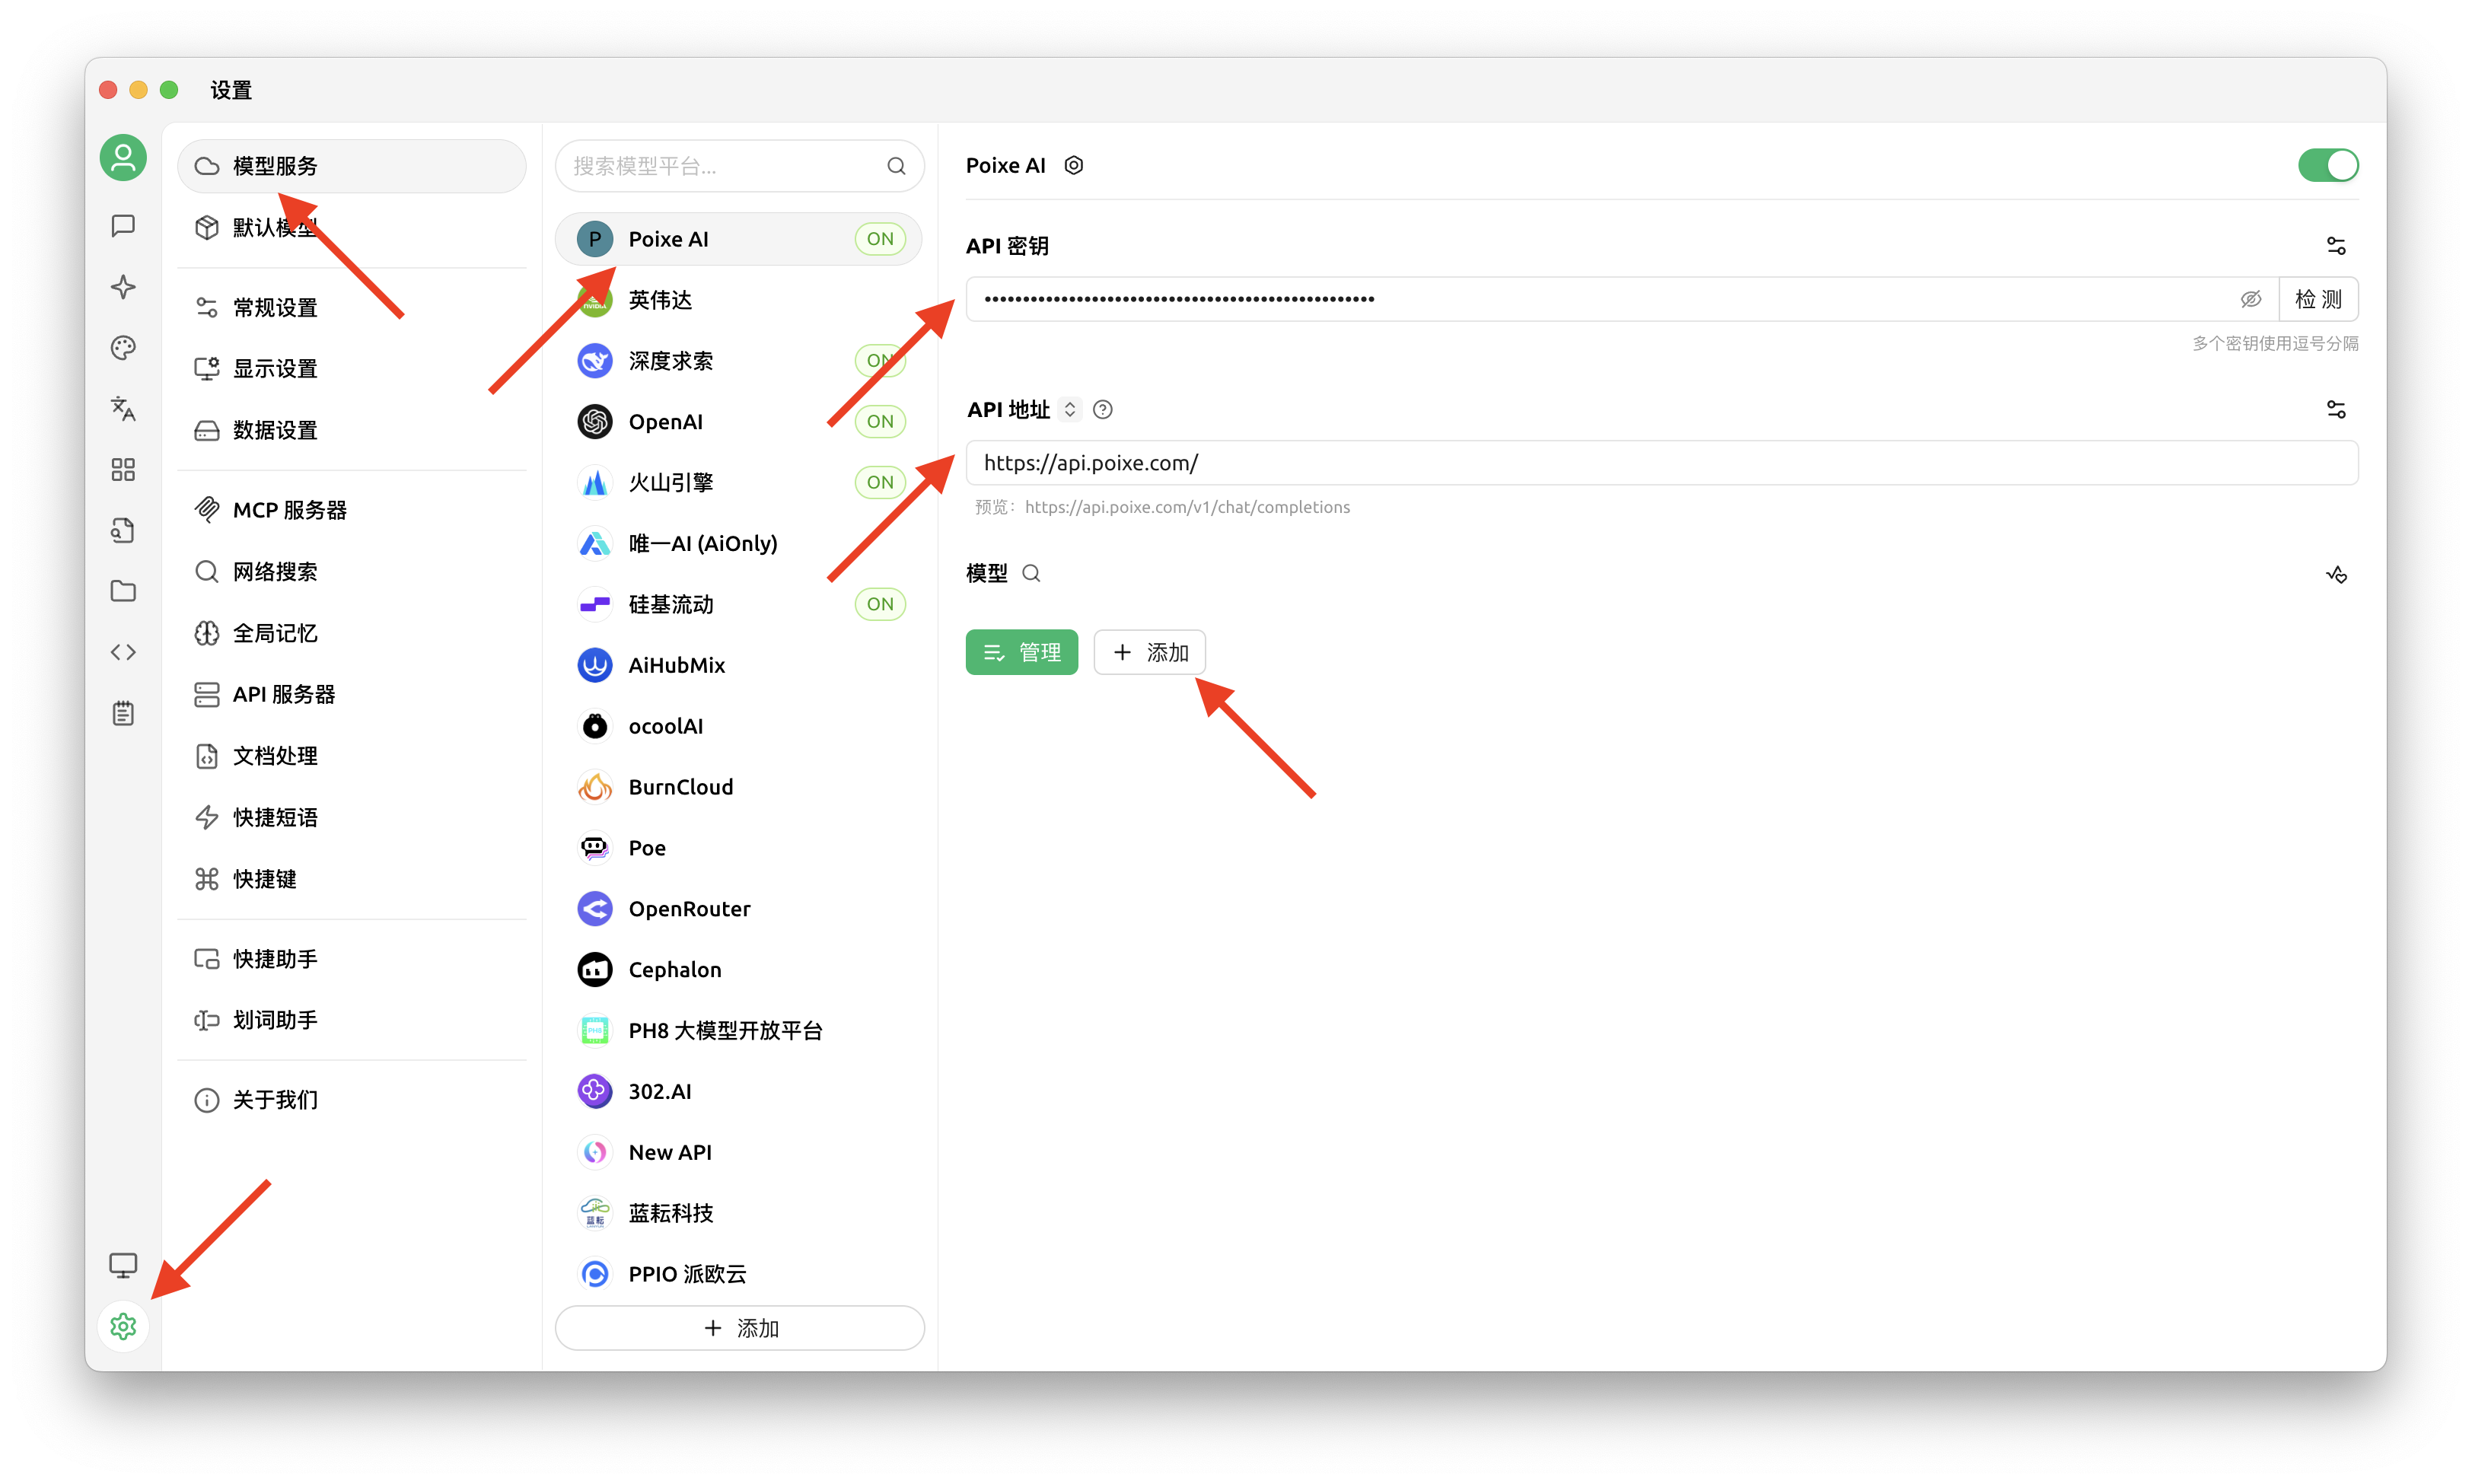 Cherry Studio 左侧导航栏点击齿轮进入设置,然后进入「模型服务」。
在模型服务页点击底部「+ 添加」添加服务商,并给它取个你一眼能认出的名字(比如:Poixe)。
「提供商类型」一般建议优先选 **OpenAI**(最通用,兼容多数聊天场景)。
在你刚添加的服务商配置里填写:
* API 密钥:填 Poixe 的 API Key。
* API 地址:填 Poixe 的 Base URL。
**需要注意:** API 密钥右侧的「检测」按钮,需要在添加模型后才能成功检测通过,因为检测需要选择一个模型进行测试。
提供商配置页面,下方点击「+ 添加」把你要用的模型名称手动加进去(例如:`gpt-4o` / `gpt-5.2` / `gemini-2.5-pro` 等,具体以 Poixe 的模型列表为准)。
不确定模型名?回 Poixe 的 模型列表 查一眼最稳。
回到聊天页面,在模型下拉里切到你刚添加的 Poixe 模型,就可以开始对话了。
## 常见问题排查
* **连接失败**:优先检查 API Key 是否正确、Base URL 是否写对。
Cherry Studio 左侧导航栏点击齿轮进入设置,然后进入「模型服务」。
在模型服务页点击底部「+ 添加」添加服务商,并给它取个你一眼能认出的名字(比如:Poixe)。
「提供商类型」一般建议优先选 **OpenAI**(最通用,兼容多数聊天场景)。
在你刚添加的服务商配置里填写:
* API 密钥:填 Poixe 的 API Key。
* API 地址:填 Poixe 的 Base URL。
**需要注意:** API 密钥右侧的「检测」按钮,需要在添加模型后才能成功检测通过,因为检测需要选择一个模型进行测试。
提供商配置页面,下方点击「+ 添加」把你要用的模型名称手动加进去(例如:`gpt-4o` / `gpt-5.2` / `gemini-2.5-pro` 等,具体以 Poixe 的模型列表为准)。
不确定模型名?回 Poixe 的 模型列表 查一眼最稳。
回到聊天页面,在模型下拉里切到你刚添加的 Poixe 模型,就可以开始对话了。
## 常见问题排查
* **连接失败**:优先检查 API Key 是否正确、Base URL 是否写对。